Casserole with salmon

A meal that has it all

A casserole with >400 gr of vegetables pp, salmon and walnuts for protein and healthy fats, great taste due to spices etc. Wint my products it has 628 kcal pp, 40 gr protein, 44 gr carbs, 29 gr of fats. You can always adjust the ingredients to your needs and likes. Also great for mealprep!

You’ll need 1 big cooking pan with lid, 1 smaller pan and a casserole.

Ingredients for two big portions;

400 gr butternut squash cut into 1-2 cm cubes

400 gr of fresh spinach

180 gr fresh salmon cut into 1cm cubes

100 gr whole grain pasta (I used penne)

20 gr of raw unsalted walnuts cut up

100 gr light cream cheese

30 gr grated parmesan (other types of cheese is fine too)

1 white onion diced

1 good piece of ginger (4 by 2cm) grated

2 cloves of garlic grated/mashed

(I personally just throw the 3 above ingredients into a small food processor and run it till it’s all chopped up)

1 teaspoon of nutmeg

1 vegetable stock block

150 ml hot water

Cooking spray (or any cooking oil)

Salt and pepper to taste

The cooking:

Preheat the oven on 180 degrees C or 356 F. Heat up the big pan with either the spray or the oil to medium heat. Add the onion/ginger/garlic and stir until very light brown. Add the squash, the water, nutmeg and stock block. Put on the lid and let it simmer for about 15 min (make sure it doesn’t burn up the water but also don’t add too much water, we need it almost dry at the end of the 15 min). In the meantime, cook the pasta in the small pan in water according to the instructions on the package and let it drain, set aside. When the squash is soft, add half of the spinach, stir and add the lid to let it wilt. Adding a bit of salt on top makes it wilt a bit faster. Then when there’s room for more spinach, add until all is wilted and don’t put back the lid because we want the water to evaporate. When there’s not much water left, add the pasta and stir well. Then add the cream cheese, walnuts and salmon and stir for a couple of minutes. Make sure it’s not too ‘wet’.

Now dump the whole mixture in a casserole and sprinkle the cheese on top. Put it in the preheated oven for about 15 min.

When you are going to use it for mealprep, you skip the last 2 steps. Before you dump everything into the casserole, you cook the mixture a few minutes longer, making sure the salmon is cooked. Now use a casserole with lid, put everything in it, let it completely cool down before you put on the lid and put it in the refrigerator. When you are ready to eat it, sprinkle on the cheese and put it in the oven a bit longer (25 min).

Enjoy!

Pureed parsnip, fennel & chicken (or a vegetarian/vegan option)

For a vegetarian/vegan swap for the chicken, check down below.

For 4 people: kcal are roughly 800 kcal per person (the version with chicken legs), it depends on the exact products you use, I’ll also give some lighter suggestions. I made this for a dinner with friends, I normally have dinners around 600 kcal. 

I’m sorry if my instructions about temperature or cooking time are a bit vague. I usually cook on the go, keep an eye on the food and adjust temperature if necessary 😅 And every oven is different anyway, so I always recommend people to never just follow the recipe exactly like it says. 

Chicken

4 chicken legs (to reduce kcal you can use chicken breasts instead of legs)

1 teaspoon of baharat (spicy mix)

1 teaspoon of salt

1 tablespoon of olive oil (+ a spray if you have that, not necessary)

Remove the skin of the chickenlegs, slice some superficial cuts in the meat. Mix the spices, salt and oil and rub it on the chicken. Bake it in the oven on 180C or 350F for about an hour. I sprayed some extra oil on it while baking and reduced the heat a bit when it started to become too brown.

Fennel mix

3 fennels cut into chunks

3 white onions cut into half and then sliced up

2 tablespoons of sesame oil 

1 teaspoon of black sesame seeds (optional)

Throw into baking tray, mix everything except the seeds and bake in the oven for about an hour until soft/light brown at about 160C or 320F, stir and reduce heat if it gets too brown too quickly. Sprinkle the seeds on it after it’s done. You can also probably do it in a pan on the stove, but I have multiple ovens so that’s just more convenient to me 😅

Parsnip puree

800 gr of parsnip, peeled and cut into cubes

3 whole cloves of garlic

200 gr of sour cream (you can reduce kcal by using light cream cheese or just reduce the amount of sour cream). Vegans can use a vegan cream alternative, if it’s a liquid product, then don’t add the extra water at the end or it’ll become too runny. 

2 tablespoons of roseharissa 

1 tablespoon of sumac 

Zest of 1 orange

Boil the parsnip + garlic (and a bit of salt) in hot water for about 10 minutes and keep a bit of the water after pouring. Put it in a food processor to blend with all the other ingredients + a bit of the water when it’s too thick. 

Optional: use parsley and almonds as garnish. 

Vegan option to swap with the chicken:

1 big or 2 smaller butternut squash peeled

2-3 tablespoons of honey (if you’re a diehard vegan and don’t use honey, you can use agave syrup or something similar)

2 tablespoons of olive oil 

1 red chilli pepper cut in half and sliced up

Salt and pepper to taste

100 grams of raw pecan nuts 

Cut the squash(es) in half, remove seeds and slice it into 0,5 cm or 0.2 inch slices. The slices from the big part of the squash I usually cut in half again. Mix all the other ingredients in a bowl, then mix with the squash on a baking tray. Bake in the oven for about an hour on 180C or 350F. Mix regularly. Keep an eye on it if it gets too brown. 

Enjoy!

My take on enchiladas

1546617039266

The guy’s dinner

Recently my guy moved in with me, so I’m looking for new recipes that we can share, or easily adjust to our own requirements. I found this great recipe for (zero weight watchers flex points) tortillas, and I decided to add some filling and make some kind of ‘open’ enchiladas. I used the exact recipe mentioned above, and added 2 cloves of garlic to the mixture before baking. I made 5 tortillas with it, 3 for the guy, 2 for me. I really thought I would still taste the cauliflower, but I didn’t, they’re really great! It made me decide to use the remaining cauliflower in the white sauce, and it was amazing.


1546617200906

My dinner

What I used for the guy’s filling:
– 200 gr low fat minced beef
– 80 gr corn from a can
– 35 gr black beans from a can
– 200 gr diced tomatoes from a can
– 1/2 green bell pepper diced
– 1/2 small onion cut small
– 1/2 crushed garlic clove
– Chili powder, cayenne pepper, oregano, salt and pepper

What I used for my filling:
Exactly the same but used a mixture of minced turkey and minced low fat beef. The whole recipe for me was 11 weight watchers flex points. Quite a lot, but so worth it!

I made a white sauce: (1/4 for me, 1/2 for the guy, refrigerated the rest)
– 10 gr real butter
– 1 table spoon flour
– 100 ml low fat milk
– 1 cup riced cauliflower
– 40 gr grated parmesan cheese
– Salt and pepper

Instructions:
I made the tortillas like the recipe said. I used 2 nonstick pans for the filling, for both I just fried the meat, then added the onion, garlic and bell pepper. After a bit of frying, I added the diced tomatoes and spices. For the white sauce, just melt the butter in a pan until it’s bubbling, then add the flour (it becomes crumbly), slowly add the milk while stirring. Add the cauliflower, a bit of water if it’s too thick. Add the parmesan cheese and keep stirring. Add salt and pepper to taste.

Fill the tortillas, add the white sauce on top and a bit of extra parmesan cheese if you want. Bake in the oven (200 degrees Celsius) for 15 minutes. You can easily make this meal ahead, put it in a oven dish and pop it in the oven when you want to eat!

Mindset over diet

I am a stress- and emotional eater. I eat fast, I eat a whole lot of bad stuff in as short time frame, I eat when I’m not even hungry, I grossly overeat when I really am hungry. When something that’s unhealthy in my mind touches my tongue, I go overboard and think ‘what the heck’. I anxiously try to eat healthy and try to keep count of everything I eat in a kind of obsessive way, to make sure I eat healthy all the time. My thoughts about food are really black and white. In my mind, I know it’s nonsense, but changing the way you feel about something is really hard. Last year I decided I needed to seriously change my thoughts and behavior, because just following a healthy lifestyle or a diet didn’t change that for me and I ended up relapsing and gaining weight again.

My current method is to stop and stand still. I try to do yoga regularly, I meditate, I have therapy and I think everything together is working for me. I’ve watched a TED-talk about addiction some days ago, which I also thought was really helpful. I thought it was a bit like mindfulness, the speaker talked about letting cravings or bad thoughts be there, accept that they’re there, but you don’t have to act on them. It works better than fighting the thoughts or cravings, because it’s like the ‘don’t think about a pink elephant game’. It only makes you think about it more! So here’s the video, I hope you guys get the same out of it I did:


Protein bars (made with protein powder)

Hi there!

I currently like to eat protein bars as a snack, because they’re easy to take with you, they’re tasty and the ones I’m eating (clean protein bars from http://www.bodyenfitshop.nl) are also quite filling. But also very expensive! So I was looking to see if I could make them myself using protein powder, which is less expensive. I combined some ideas I saw online and came up with these tasty, easy to make and no-bake bars:

Recipe is for 8 bars:  PicsArt_04-27-09.19.28
1 bar is 2 sp for you ww people out there

1 bar contains 106 kcal, 6.4 gr carbs, 2.8 gr fat and 12.6 gr protein.

Ingredients:

  • 1 banana
  • 100 ml (1/2 cup) of unsweetened almond milk
  • A splash of liquid sweetener (to taste)
  • A few drops of vanilla and rum essence (or whatever tastes good to you)
  • 50 gr coconut flour
  • 20 gr unsweetened peanutbutterpowder
  • 100 gr of coconut flavour whey protein powder (I use whey perfection)
  • 15 gr raw cacao nibs
  • 20 gr psyllium fiber

Mix the liquid ingredients with the smashed banana, set aside. Use a sieve for the flour, peanutbutter powder and protein powder, and mix with the cacao nibs and fiber. Throw like a teaspoon of this mix in your pan/mould to ease removal afterwards! Now pour the liquid mix on top of the ‘dry’ mix, and mix until it becomes like a dough. If it’s too dry, add a bit of extra almond milk. It shouldn’t be too wet, because it will not really dry up anymore. Press the dough into a pan, a mould or whatever has a shape that suits you. Put in the fridge for a couple of hours, remove, cut into 8 pieces and use a bit of baking paper to wrap them, because they’re still a bit sticky! Store in the fridge, enjoy!

PicsArt_04-27-09.35.45

Veggie lasagna

My mom gave me the Jamie Oliver’s superfood cookbook for Christmas and I’ve been using it to get some new ideas. Of course I’m not going to completely copy somebody else’s recipe, but I like to use it as inspiration to come up with something that fits my lifestyle, so here is the veggie lasagna recipe everybody’s waiting for 🙂

It contains 291 kcal per portion, 26 gr carbs, 11 gr fat and 24 gr of protein. It’s 6 sp on weightwatchers!

Ingredients for 2 portions:

  • 1 squash/pumpkin (the long type) IMG_20160208_141419
  • 1 zucchini
  • 1 onion
  • 2 tomatoes
  • 2 hands of fresh spinach
  • 20 gr sunflowerseeds
  • 200 gr cottage cheese
  • 20 gr parmesan grated
  • salt, pepper and italian herbs

Preheat your oven to 340 degrees F or 170 degrees C. I use a silicone cake-shape baking mold to get it in the shape I want. Use a cheese slicer or any other tool to make very thin slices of zucchini and squash. When you reach the middle of the vegetable, it won’t give you nice slices, so cut those piece up and use it in the sauce. Lay the nice slices out on some plates (you’ll also get some bad slices, use them in the sauce!) Sprinkle some salt on the slices. It’ll draw out some of the water which you can remove with some kitchen towell. Repeat once. In the mean time, cut the onion, tomatoes, zucchini and pumpkin pieces and fry it in a nonstick pan. Add the spinach and let it shrink. Make sure it get’s thick and most of the moisture is gone! Add the salt, pepper and herbs.

IMG_20160207_111352Start layering your ingredients, start with pumpkin slices and use your imagination to make the rest of the layers. Be aware that normally the pasta plates absorb a lot of moisture. Making lasagna without the pasta will create a lot of moisture, so make sure you drain the cottage cheese before you use is and make the sauce as thick as possible. End with the pumpkin slices again and sprinkle with the parmesan cheese.

Put it in the oven and bake it for about 30-45 minutes, check it regularly for getting too brown. After this, remove from the oven, cut it in half and remove. Let it drain a bit on a plate to remove some of the excess moisture and enjoy!

Kcal in/out & fat burn zone

I am so guilty of obsessing over my kcal burn at the gym compared to my calory intake, especially since I got my new Fitbit Charge HR. It’s funny how we perceive something to be so true and solid, while at the same time, it’s really fooling us. For example, how do you know your food contains exactly the amount of calories you’ve calculated? You actually don’t, its all an estimation, which is fine by me, but thought you might want to know before you stress out over a few of them 😉

So now something about the fat burn zone. It has been a myth for a long time, that in order to lose weight or lose fat, you need to do low intensity steady state (LISS) workouts to burn fat. The myth says your heartrate needs to be in a certain zone to maximise the amount of fat burned. There is a bit of truth behind it, but not in a way you might think. I’ll try to explain. Screenshot_2015-12-19-21-49-09-1

Your body contains a certain amount of glycogen, which is basically long chains of glucose. There’s some storage in the muscles and in the liver. It’s a fast and easy way of providing the body energy fast when it needs it. Like in emergency situations, where you have to run away fast in case of danger for example. The thing is, your body really wants to preserve this storage for these emergencies, but will use is when it’s necessary. Fat burning is slower though, it needs more processes to get to energy so it’s not efficient in emergencies. So, for example, you go for a long and sturdy walk (LISS), the body will burn some glycogen, but finds out you go slow and steady (no emergency), so it starts up the processes of burning fat. Slowly, the amount of fats used as energy will increase and the amount of glycogen used will decrease. It will never go to 0%, but because of the slow and steady pace, you’ll have a higher % of fatburn in comparison to the fast and shorter situations where you’ll get a higher % of glycogen burn.

So up to now, you’ll be like, ok, you said it’s a myth but this really sounds like LISS is the way to go for fat burn? I’ll try to get to the clue. It is ALL about energy in and energy out. If you burn more energy than you eat, you’ll lose weight and vice versa. It doesn’t really matter if you burn a higher fat %, because in the end, the body will restore the glycogen stores, using the fat stores if you don’t eat more than you burn! And guess what, the more intense the workout, the more kcal you burn, so in the end, you’ll also burn more fat with intense workouts. There’s been a lot of research about High Intensity Interval Training (HIIT), which is short bursts of high intensity training followed by short periods of lower intensity training. It happens to be that you’ll burn a lot more kcal during these workouts, but also AFTER them, making them very efficient for losing weight!

So before I conclude I’ll have to add something else. There actually are other benefits of LISS, like getting more endurance. You’ll not hear me say that you shouldn’t do LISS. It’s just that I think it’s good to know what type of exercise benefits are out there and what will fit your goal! Personally, I’ve been heavy weightlifting (which is also a bit of a HIIT workout) since the start of my journey. For the first 10 months or so, I never did any cardio. Right now, I do 20 minutes of HIIT intervals on the elliptical after weightlifting. I also try to get 10.000 steps daily, which means I go for walks almost every day, which is my LISS workout. It keeps me active and energetic!

Zucchini crust pizza recipe

It’s been a while, but I’m still alive and doing well! Today I’m uploading a recipe for a great zucchini crust pizza. I’ve IMG_20150726_204046combined some things I’ve seen on the internet and sprinkled it with some own ideas 😉 Be aware, this is not a ‘low fat, carb free, whatever whatever’ recipe. I LOVE cheese, so there’s a lot of real cheese in this recipe. Of course you can change it to your liking. Personally, I believe that if you crave real pizza, go and eat real pizza! One pizza won’t make you fat, just as one salad won’t make you skinny. Myself, I don’t care too much for the wheat based crust, I care for the cheese, so that’s why this pizza is great for me and right now it’s zucchini season so I can get a lot of them for free from my parents garden or from my own balcony. (Unfortunately my round zucchini plant suffered from the storm we had over here 2 weeks ago, it might not give flowers anymore, boohoo)

Ingredients for 1 big ass pizza (you can definitely use this recipe for 2 smaller pizza’s!):

Base:

  • 2 store bought zucchini’s (or 1 large one)
  • 30 grams of goat cheese flakes (or parmesan cheese) full fat
  • 40 grams of coconut flour (or use regular whole wheat flour or almond flour, you might have to add more of it though, because coconut flour is really dry)IMG_20150805_182724
  • 2 eggs
  • Salt, pepper, garlic powder (or real garlic)

Toppings:

  • A 7-8 biggish grape tomatoes or 2-3 normal ones, sliced
  • A cup of mushrooms, sliced
  • A small tin of tomato paste
  • 50 grams of blue cheese full fat
  • Italian herbs

Instructions:

Preheat the oven on 180 Celcius or 350 Fahrenheit. Grate the zucchini and put it in de microwave for about 2,5 minutes, stir with a fork and then another 2,5 minutes in the microwave. You’ll see a lot of fluids coming from the zucchini, that needs to be drained. Let it leak through a dish towel, or use a strainer or anything that will let the water flow away. You can also squeeze it a bit to remove most of the water. Now put it in a bowl and add the othe20150805_183628r ingredients for the base. Stir, if it’s too watery, you can add a bit more flour. Put the ‘dough’ on a ovenplate, I use baking paper. Push it around untill you have a pizza base shape, make sure you don’t leave it too thick and make sure the edges aren’t too thin (the edges will burn first!). Now put the oven plate in the oven and bake for about 20 minutes. You check the base to see if it’s a bit firm. 20150805_191351Now I do the magic trick, I put a grill on the base (do you call it a grill? Check the pic!) and turn it around, so the base now lies on the grill and can be baked properly in the oven. I usually bake it for another 20-30 minutes, check how it looks, if it gets darker too fast reduce the temperature a bit.

20150805_191801

Now remove it from the oven, add your toppings and put it back for about 10-15 minutes. I usually use regular tomato paste, then add the herbs (if you put them on top, they might burn), then the mushrooms, then tomatoes and finish with the cheese.

Nutritional information:

Kcal: 811, Carbs: 49 grams, fat: 44 grams, 20150805_192058
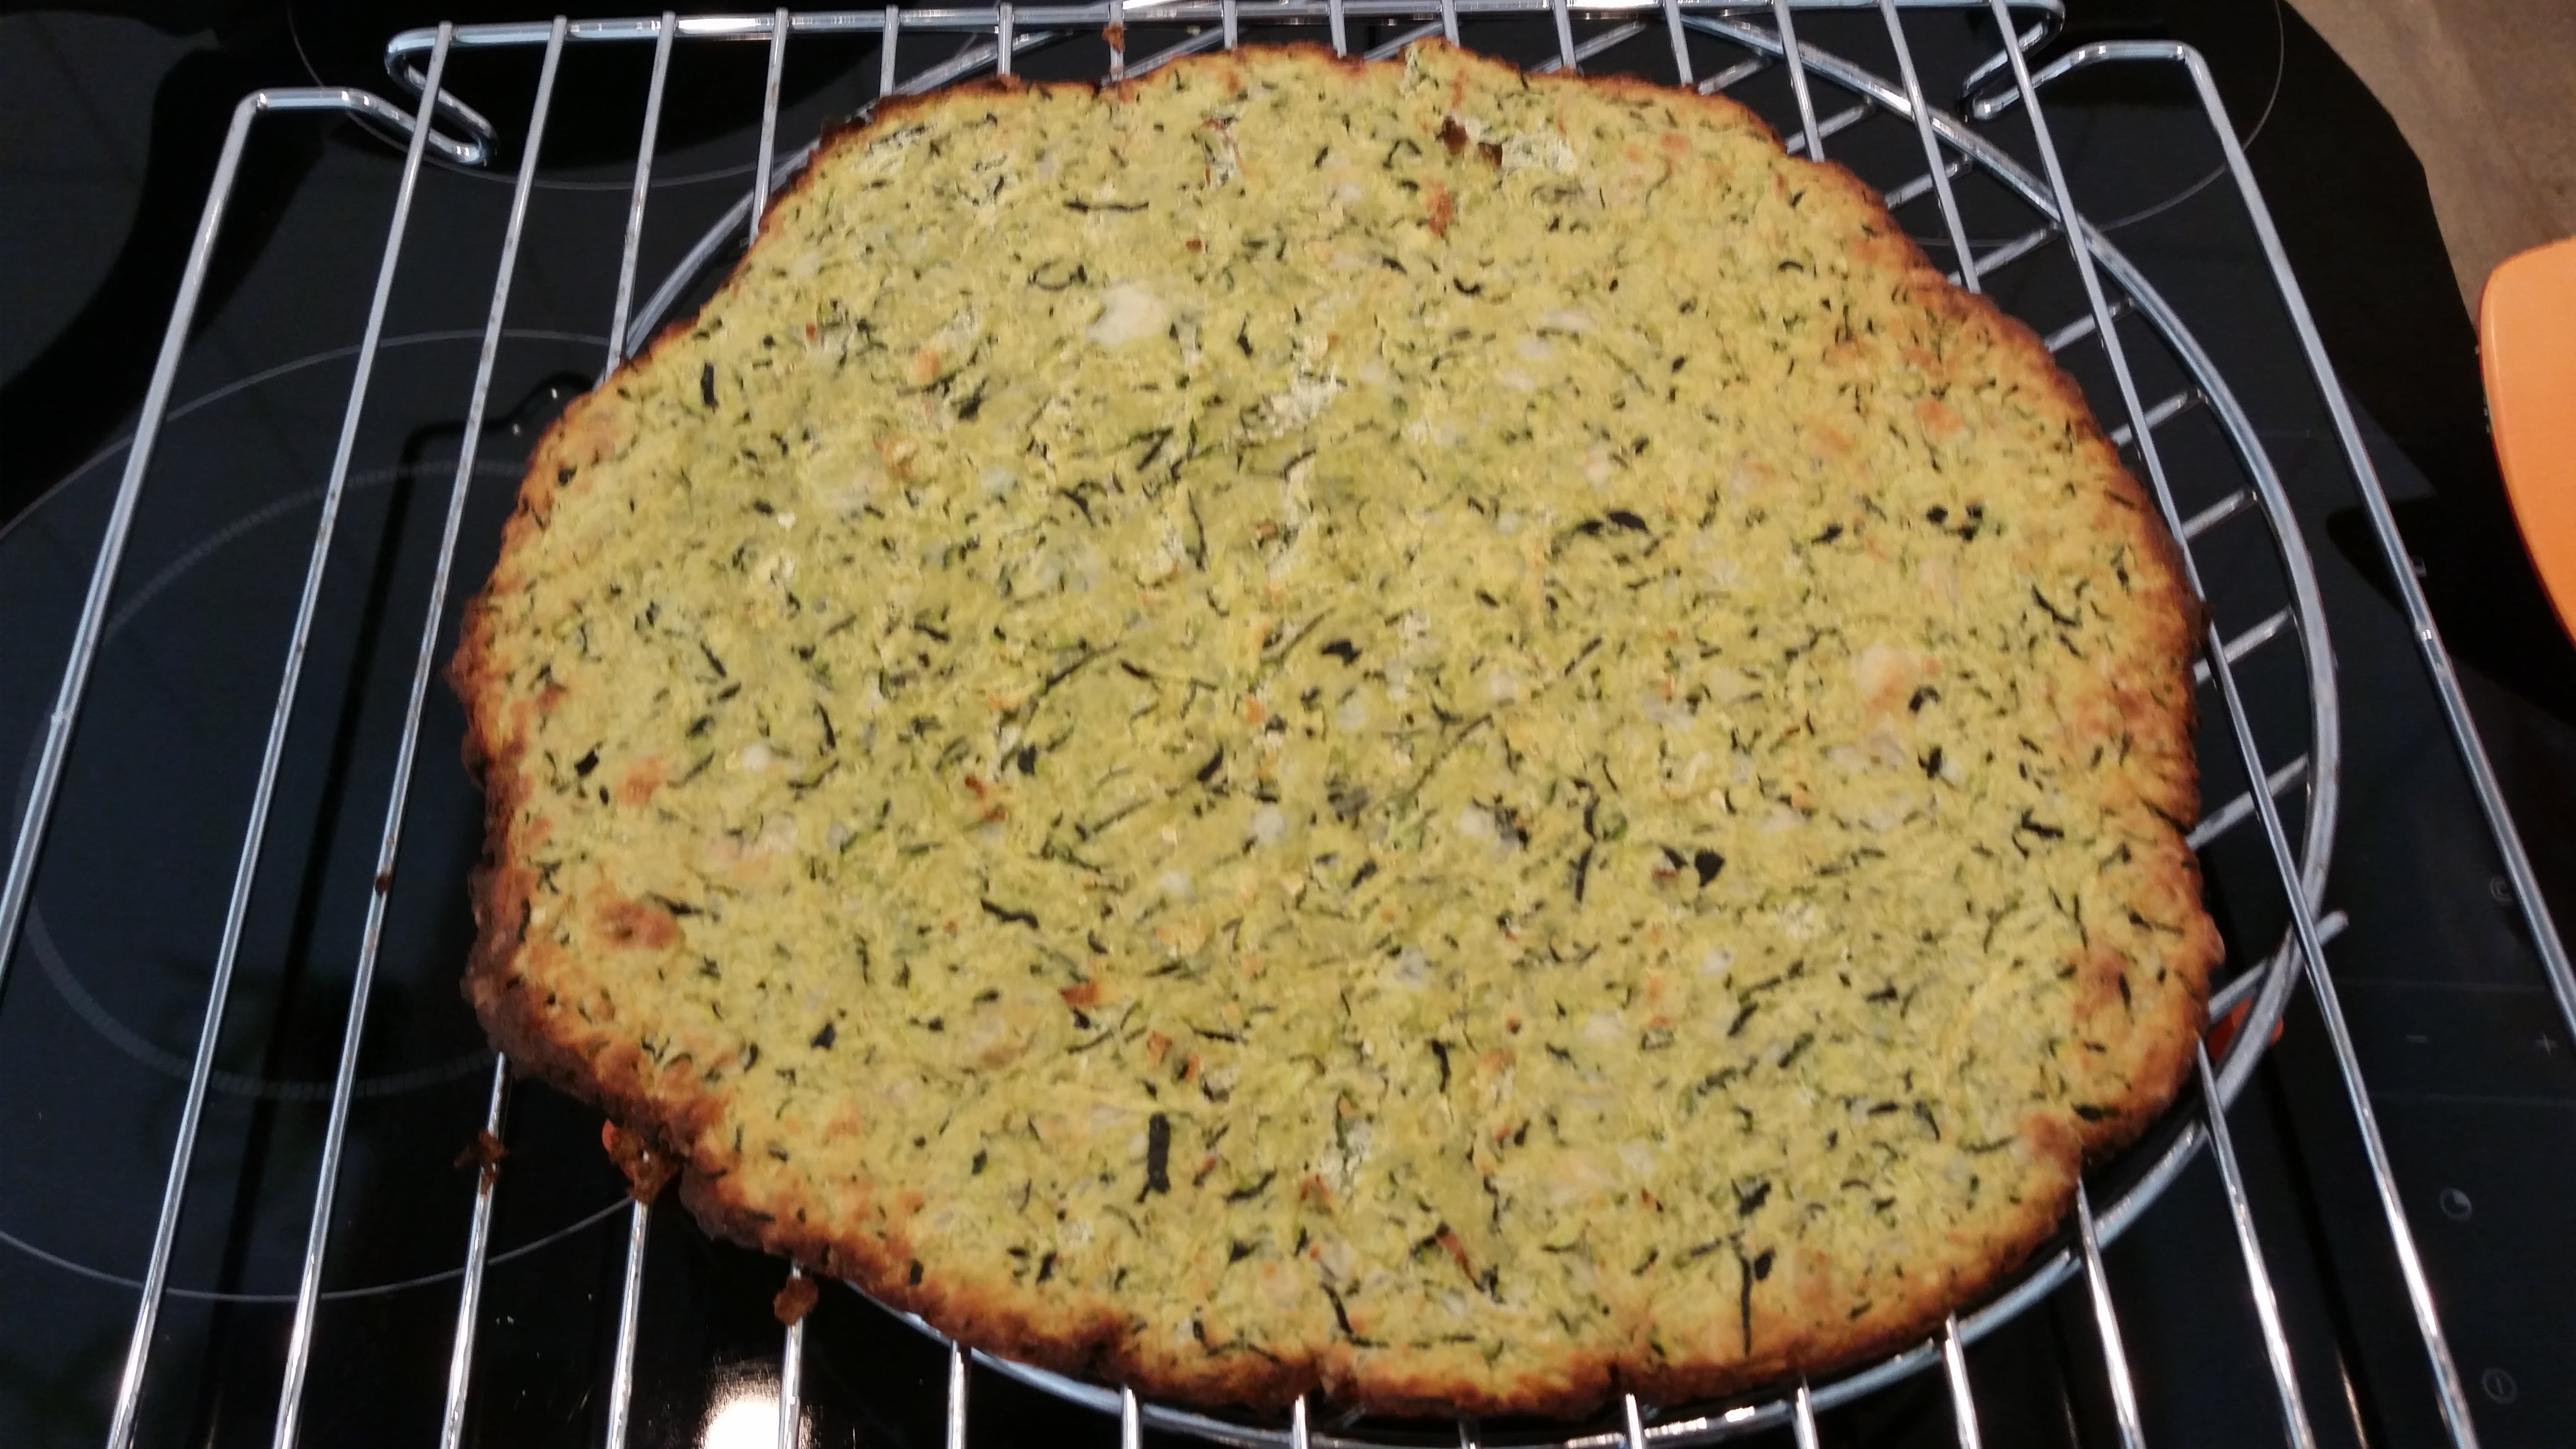
protein: 54 grams. (adjust when you change the ingredients!)

IMG_20150805_194216Enjoy!

Mealprep week 22

This week’s mealprep was really something…. I wanted to prep different type of meals this week, not eating the same every day like I usually do. Don’t get me wrong, I never have a problem with eating the same. I just wanted to spice it up a bit AND show people it can be done if you really want to! Of course it took more planning and more time prepping (aprox. 3,5 hours), but I’m really pleased with it. I’m writing this on Friday, so I’ve almost eaten all of the meals and it was really great! Especially the new recipes I tried. Here’s the pic, I’ll break it down for you so you know what everything is and what I made. Day 1 starts on the left, first meal on the top, last meal on the bottom. I’m doing leangains intermittent fasting now, so this means I eat all my meals between noon and 8 pm, the rest of the time I fast. The first two days (Monday and Wednesday) are high carb as I’ll workout on those days, the last two days (Thursday and Friday) are high fat as those are restdays from weightlifting. All days are high protein (130gr a day or higher) and about 1700-1900 kcal a day. All days have veggies as snack.

IMG_20150524_170422

Day one (high carb workout day):

Meal 1: Oats with protein powder, unsweetened almond milk, seeds and topped with pb, a banana and an apple.

Meal 2: Egg muffins with smoked salmon, roasted sweet potato and carrots

Meal 3: Veggies and burritos with chicken, avocado, bell pepper and cilantro

Day two (high carb workout day):

Meal one: Oats with protein powder, unsweetened almond milk, seeds and topped with pb and blueberries

Meal two: Beanburgers (I’ll try to upload the recipe soon because they are delish), cilantro and green asparagus

Meal three: Meatloaf, broccoli, yellow brown rice and a grapefruit

Day three (high fat rest day):

Meal one: mini burgers, raw cauliflower, lightly steamed broccoli, almonds and an orange

Meal two: zucchini spiralized and lightly steamed with blue cheese and garlic shrimps

Meal three: salad with lettuce, egg, tomatoes, goat cheese and avocado and almonds

Day four (high fat rest day):

Meal one: veggies, chicken, blue cheese, almonds and an apple

Meal two: frittata with green asparagus, broccoli, smoked salmon, egg and goat cheese

Meal three: stuffed bell peppers with minced meat and blue cheese

All or nothing

It’s been a while since I’ve written anything over here. My main medium is Instagram, I use this blog when I feel the need to write more than a couple of sentences. Today I feel like writing something about the ‘all or nothing’ principle a lot of us (former)fatties have stuck in our head. For me, this has been the reason why I have clothes in all sizes in my closet (ok, recently I gave the bigger ones to charity because I’m really done with that, yay!). I always felt like either I was on a strict diet and exercise regularly, OR I was eating ONLY bad stuff an no exercise at all (All or nothing!). Preferably this was divided by weeks/days/months, so THIS week, I’m doing good, or, THIS week is already ruined and I will start my strict program next Monday (always Mondays, why don’t we ever start a diet on a Tuesday??).  This resulted in a lot of weight fluctuations and not being able to maintain any type of weightloss. As you may (or may not) know, I’ve been on my ‘getting fit’ journey for over a year now and I must say, it really is something I struggled with, but I feel like I’ve got it now! I’ve realized (and also experienced), that weightloss takes time over several weeks/months/years and losing weight is all about the balance towards the healthier choices. That doesn’t mean you should choose healthy all the time. I sometimes skip the gym because I had a long day at work, and guess what? The week is not bad because of it! I also had a fantastic easter dinner last sunday and guess what, I’m still doing ok and losing weight. Losing this ‘all or nothing’ mentality has really made the difference for me. It doesn’t mean I have no problems with losing weight anymore, it just means I am psychologically better equipped for maintaining a healthy lifestyle for the rest of my life. I still have binge moments, especially when I’m tired or emotional. I guess this is something I’ll have to deal with for some time, I hope it will go away, but if it doesn’t, I’ll find a way to make it work. So, there’s one thing a lot of my IG buddies talk about when I post about it, and that’s Yoga! I will write something about it in my next post!